WeCom
Used to define the content of the notification that users receive on WeCom when an alarm is triggered. With this setting, you can customize the alarm notification message to ensure recipients can quickly understand and respond to the alarm.
Create Notification Message
- Click "Alarming "->" Alarm Notifications "->"Messages" to enter the notification message list page.
- Click the "Add" button. In the new pop-up window, select "WeCom".

- Click "Next" to enter the detailed configuration window.

- Once the setup is complete, click "Send Test" to check if the email is sent successfully.
- If the test is successful, click the "OK" button to add the data.
Properties
| Name | Description |
|---|---|
| Name | The name of the notification message is required. The name is unique and cannot be repeated. |
| Description | Description of the message of the notification, optional. |
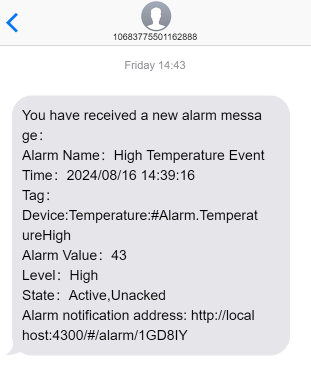
| Message | The content received in the email is configured through the content settings button. Clicking this button will bring up a content parameter dialog. The parameters set here will be replaced with actual values when an alarm occurs. To insert a parameter into the email content, click in the content window to place the cursor, then click the parameter settings button. From the parameter list, select the desired parameter by clicking on it, and it will be automatically inserted at the cursor's position. 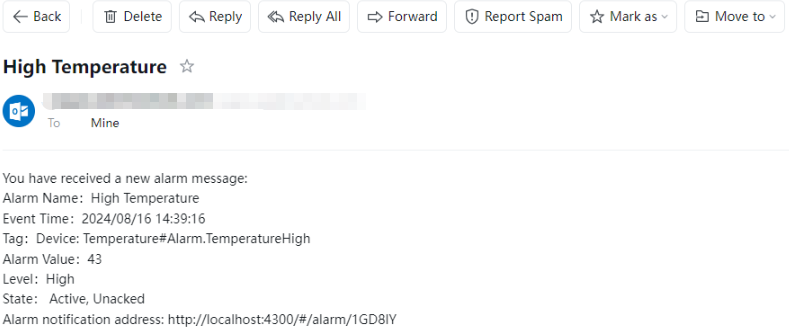 Note: urlPath (alarm address parameter) is used to construct the URL for the alarm information, which consists of the server address, port number, and the specific page path. The detailed explanation is as follows: Note: urlPath (alarm address parameter) is used to construct the URL for the alarm information, which consists of the server address, port number, and the specific page path. The detailed explanation is as follows: 1. Server address and port number: http://localhost:4300 This means that the request will be sent to a server named "localhost" and accessed via port number "4300". When adding a new entry, the current server address and port will be automatically retrieved. 2. Page path: /#/alarm/ This path is fixed and points to the alarm confirmation page. 3. Specific path: {urlPath} This is a placeholder representing the specific alarm parameter path. When receiving an actual message, this placeholder will be replaced with the real alarm parameters. |
| Send Test | After completing the above configuration, click the Send Test button to open a new window. In this window, select the previously created WeCom service, then choose one of its groups or user accounts. Finally, click Send to verify that the alarm notification is received in WeCom.  |
How to use the WeCom Notification Service
In the alarm notification rules, you will select the notification service.
- Click on "Alarming" -> "Alarm Notifications" -> "Rules" to enter the notification rules list page.
- Click the "New" button in the upper right corner of the list.
-
In the pop-up window, click the '+WeCom' button to add a new sms notification rule.In the notification message dropdown, select the previously created notification message.